Heat Mapping Tool


Perfect for operations, sales, marketing, and data analysts who want to spot and analyze trends in their data

What is a Heat Mapping Tool?


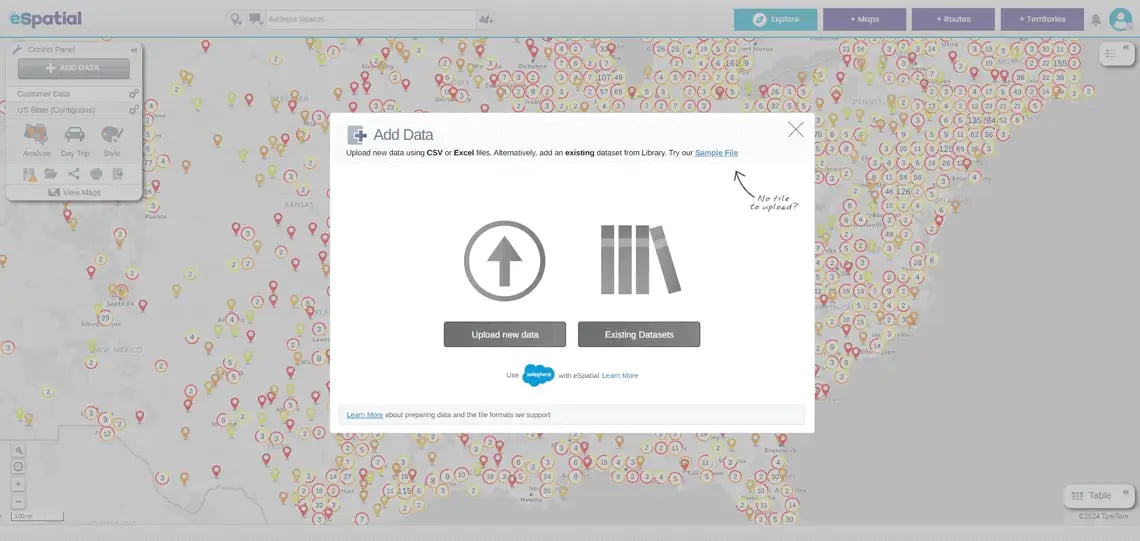
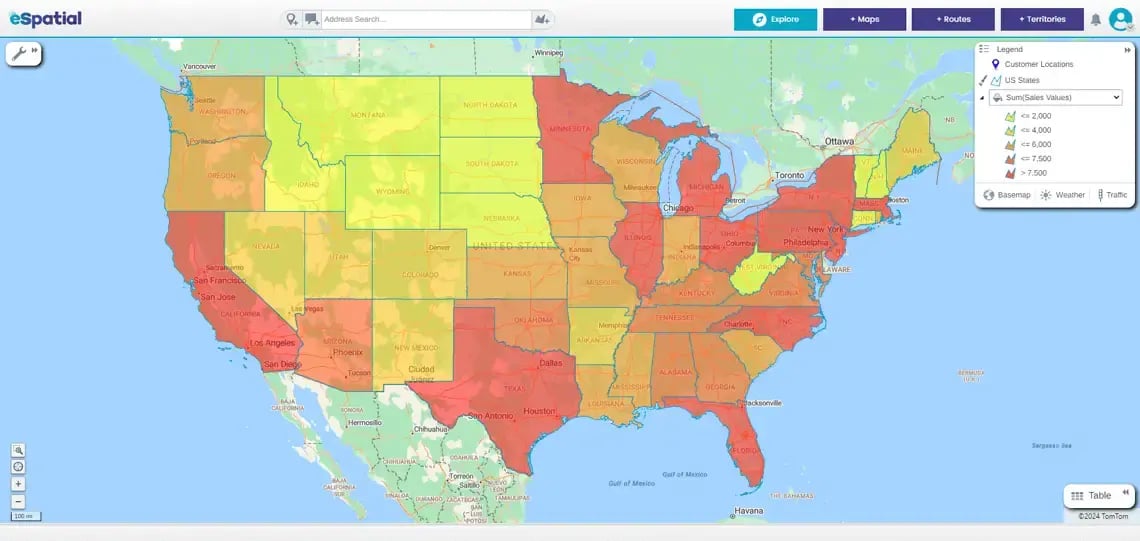
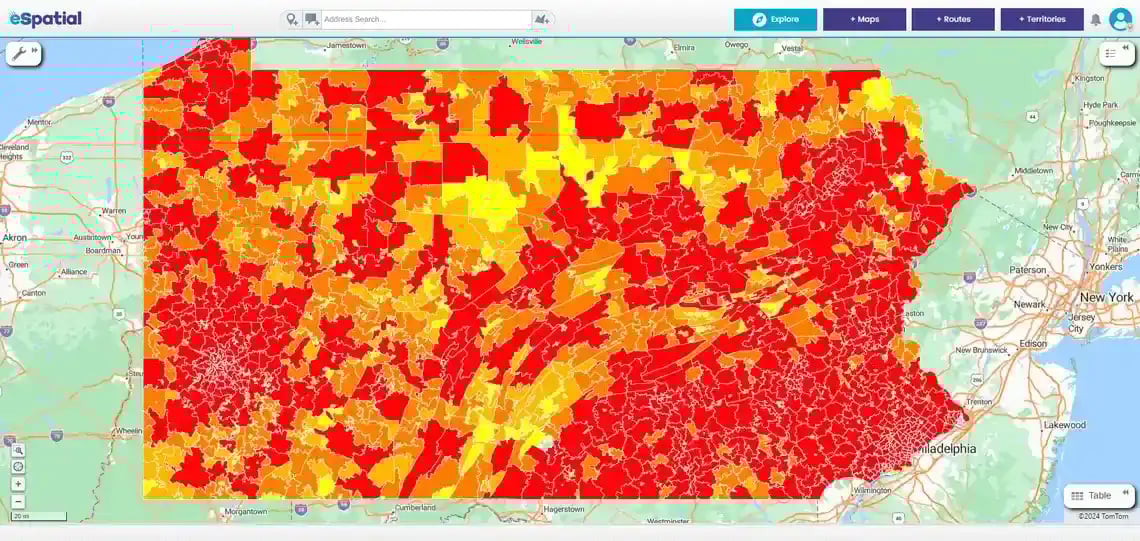
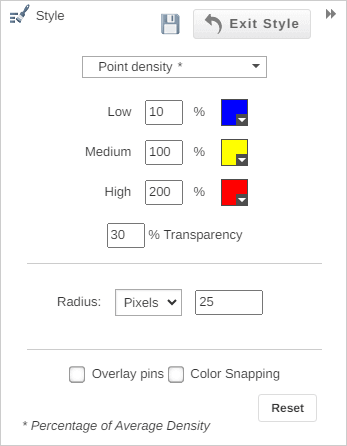
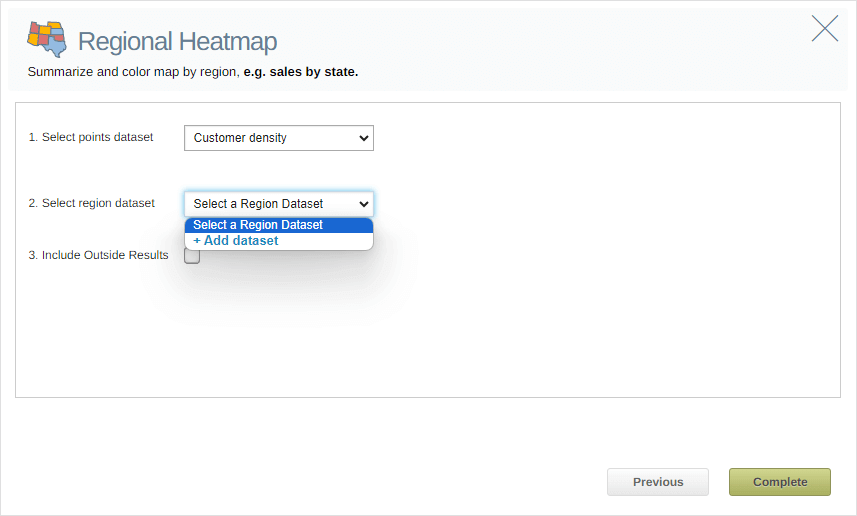
It is a visual tool that uses color intensity to represent data density on a map.

How it works: Turn raw data into a clear, colour-coded map. We paint your data from "cool" (low activity) to "hot" (high intensity) so you see exactly what is happening.

You stop scanning spreadsheets and start spotting patterns, trends and concentrations in milliseconds.

Add data to map

Data Input

Add your location-based data (like customers, leads, facilities, or asset locations) into the mapping software.

US regional heat map identifying locations for offices and distribution centers

Flexible Aggregation

Instantly group data by county, state or postcode—or define your own custom territories.

Color coded data representation

Color-coded Clarity

How it works: The map automatically assigns color intensity to match your data density.

  • Hot zones: High values glow red or orange to signal activity
  • Cool zones: Low values stay blue or green to show gaps

You instantly distinguish high-performance territories from quiet ones without checking the raw numbers.

Hotspot heat map

Visualise on Your Terms

Don't just view data—interact with it.

  • Customise: Choose color schemes that fit your specific needs
  • Adjust: Dial the level of detail up or down instantly
  • Explore: Click and interact with the map to uncover hidden insights

How Do You Use the Heat Mapping Tool?


Sales, operations, marketing, urban planners, and public health use heat mapping tools to analyze spatial patterns and make data-driven decisions. They provide a visually intuitive way to understand geographic data and can help identify opportunities, trends, and areas for improvement.

eSpatial is capable of creating a hot spot heat map or regional heat map.

1. Hot spot heat map

Step 1

Select the + ADD DATA button.

Add data button

Step 2

Select Upload new data and upload your spreadsheet.

Upload new data button

Step 3

After your location data has been added to the map, click Style.

Control panel with the style button highlighted


Step 4

Select the Heat Map switch.

Hotspot heat map switch

Step 5

Configure your hotspot heat map settings. Click the disc icon and then click Exit Style.

Hotspot heat map settings

Step 6

Example of a hotspot heatmap after it is configured.

Heat map of the United State

2. Regional heat map

Step 1

Select the + ADD DATA button.

Add data button

Step 2

Select Upload new data and upload your spreadsheet that contains locations data.

Upload new data button

Step 3

After your locations data has been added to the map, click Analyze.

Control panel with the analyze button highlighted


Step 4

Select the Regional Heatmap button.

Regional heatmap button

Step 5

Dropdown field 1 will contain your locations/points dataset. You will need to select a regional dataset to measure the density of your locations data against.

Regional dataset select field highlighted

For example, if you're locations data are all in the United States, you could select the US State data from the eSpatial datastore.

US states dataset from eSpatial library

Step 6

Example of a regional heatmap after it is configured.

Regional heat map

You appear to be offline at the moment, this notice will disappear once your device can connect to the internet again