
A radius map (or buffer map) draws a circle around a central point to capture all data within a specific distance.
It turns distance into a business filter. You instantly see which customers, leads, or assets fall within a specific service area or drive-time zone.
Radius maps are powerful way to use interactive mapping software that helps businesses with smarter territory planning.
The business impact
- Territory Planning: Assign the closest reps to customers to cut travel time
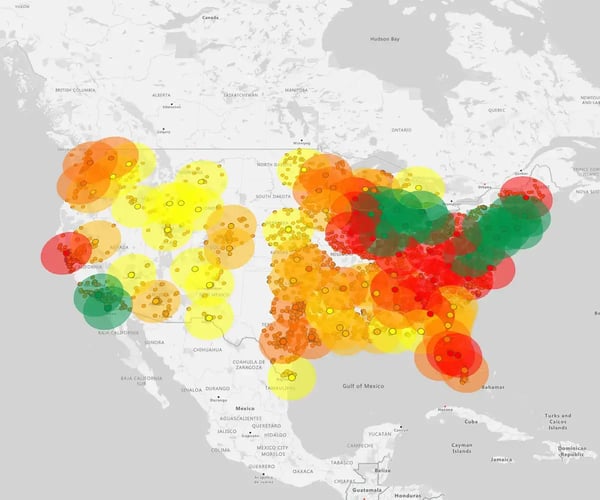
- Gap Analysis: Visualize coverage dead zones where you need new sites
- Targeting: Isolate high-potential prospects within a specific range for hyper-local marketing
- Logistics: Optimize routes to maximize service capacity
There are two ways to draw a radius on a map. One is distance-based and the other is based on driving time. Let’s take a closer look at the differences between these two types.
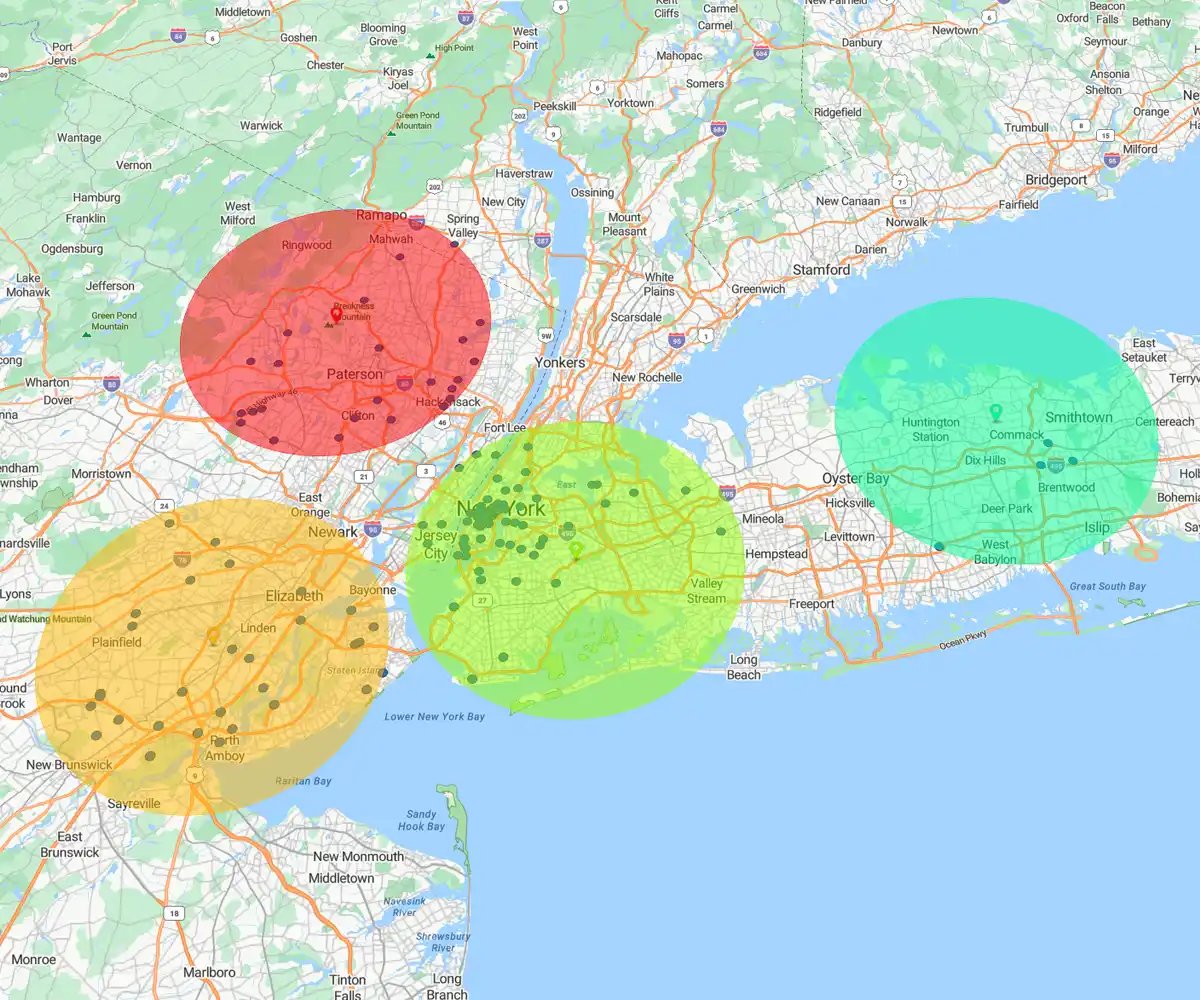
Distance-based Radius
Draws a perfect circle (e.g., 10 miles).
Best for: Broad market reach, direct mail campaigns, and measuring simple proximity.
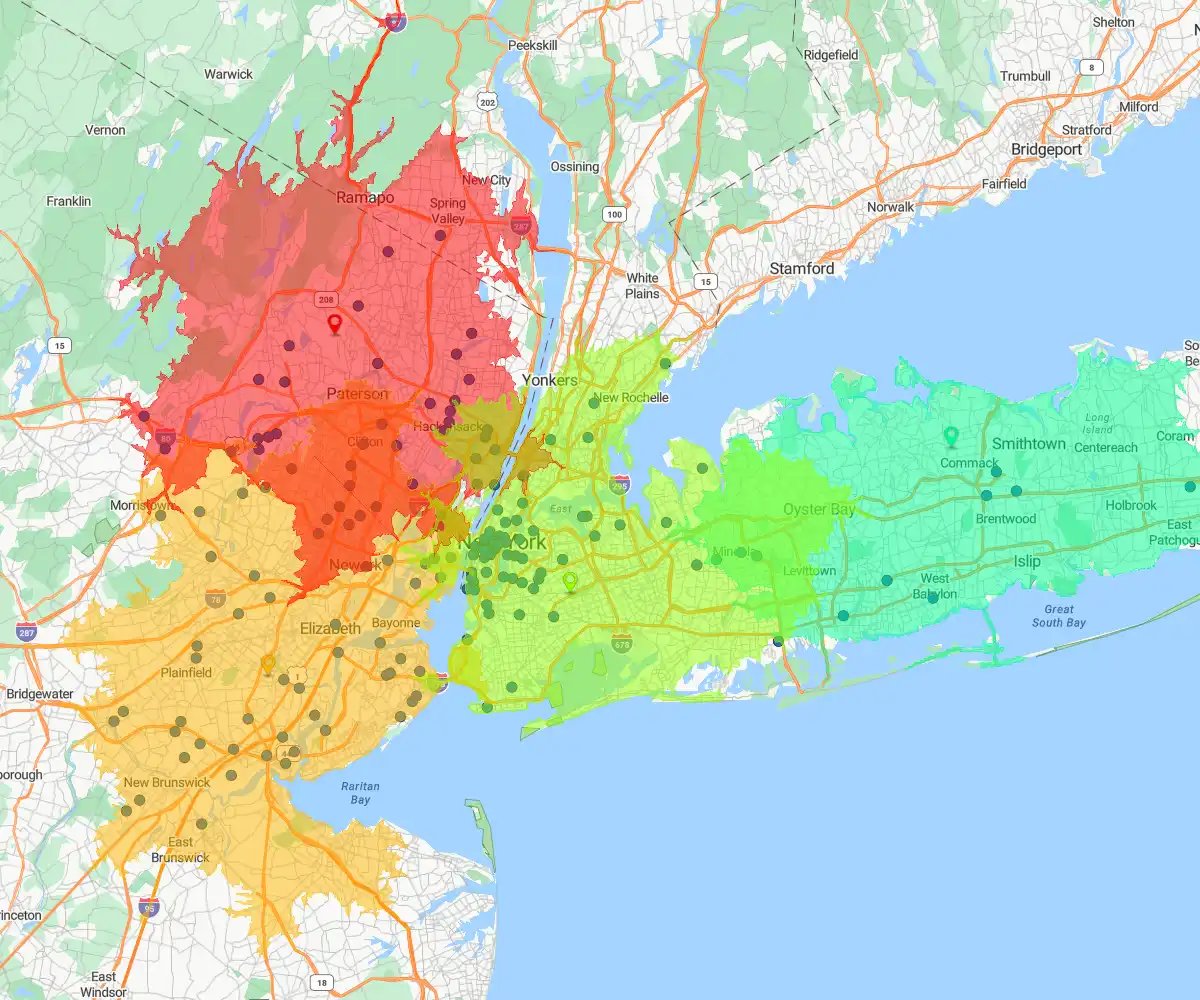
Drive-time Radius
Draws an irregular shape based on travel time (e.g., 30 minutes).
Best for: Logistics, service calls, and sales routes where traffic and road networks determine reality.
Once you define your goal, the tool handles the math. The workflow: Plot buffers, set parameters, and customize your visualization in minutes.
Step 1
Choose Your Tool
Select the radius type that matches your operational reality.
Distance-based: Best for physical assets
- Use when: You need a fixed perimeter (e.g., 10 miles) for cell towers, billboards, or stores
- Ideal for: Rural areas where traffic doesn't skew travel time
Drive-time: Best for people and logistics
- Use when: Traffic dictates accessibility. Essential for sales reps, delivery drivers, and service technicians
- Ideal for: Urban zones and planning service-level agreements (e.g., "within 30 minutes")
Step 2
Draw the Radius
To draw a map, you need two things: a center point (e.g., a sales rep) and surrounding data points (e.g., customers).
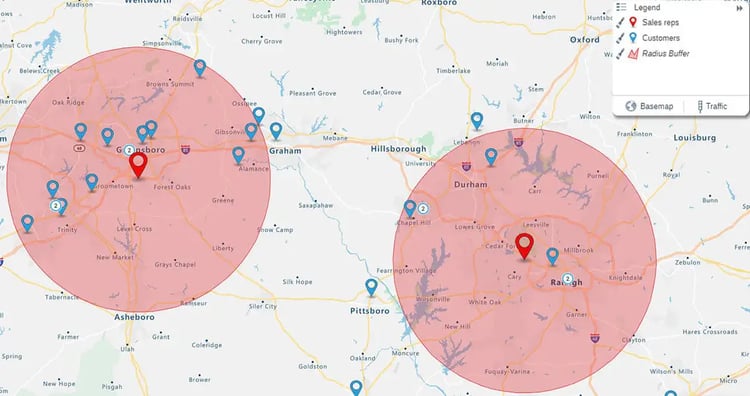
Drawing a Circle
- Upload your data (e.g., reps and customers) and select Analyze

- Select Radius

- Choose a distance (e.g., 10 miles), select your center points and surrounding points, then hit Complete

- A circle appears showing all customers within that set radius, which is perfect for proximity mapping techniques that harness the power of geography to unlock spatial insights
Drawing a Drive-Time Area
- Upload your data (e.g., reps and customers) and select Analyze
- Select Drive Time

- Enter a drive-time length (e.g., 30 minutes), then hit Complete

- You'll see a real-world travel zone based on roads and traffic, which is ideal for planning routes and coverage realistically
Step 3
Customize and Style
Don't settle for the default view. Tweak your map to highlight exactly what matters.
Refine your analysis
- Edit: Click Analyze to adjust distance or toggle "Outside Results" to spot missed opportunities
- Style: Adjust fill colors and transparency to clarify zones without hiding underlying data
- Layer: Overlay competitor or lead data to see density patterns
- Context: Switch basemaps—light, dark, or satellite—to match your presentation
Real-world applications
Radius maps move beyond theory to solve specific industry problems.
Use cases:
- Real Estate: Evaluate property proximity to amenities like schools and parks
- Emergency Services: Assess critical coverage zones for fire and police stations
- E-commerce: Analyze delivery times from fulfillment centers to pinpoint where you need new micro-sites
Radius maps are not one-off reports. They integrate directly into the daily workflow across your organization.
The daily impact
- Sales Managers: Design balanced territories and spot underserved areas for instant growth
- Marketers: Target campaigns with precision based on customer proximity and range
- Operations Teams: Plan site visits and deliveries efficiently to maximize time and cut fuel costs
Learn more about eSpatial pricing plans and let us help.